
Inspection readiness
Good solar mounting should be ready for inspection.
A clean solar installation should not be mysterious. The roof attachments, mounting method, waterproofing details, structural path, electrical layout, and permit documents should tell the same story.
Permit review principle
The field work should match the approved plan.
Inspection is not just a final hurdle. It is part of the quality-control path.
Solar mounting work should be planned so the inspector can understand what was installed: roof type, attachment method, structural target, rafter or framing logic, flashing method, equipment layout, electrical pathway, and any required structural or manufacturer details.
SolarMount.com rule: if the mounting detail cannot be explained to the inspector, homeowner, roofer, and installer, the project documents or field work need more clarity.

Inspection checklist
What should be ready before inspection?
A good inspection path starts before installation day. The crew should know what must remain visible, what must be documented, and what the plan set requires.
Approved plan set
The installation should match the approved drawings, notes, equipment, structural details, and roof-mounting approach.
Roof type and condition
The inspector and project team should understand the roof material, condition, access limits, and roof-specific mounting method.
Attachment method
Mounting feet, rails, clamps, fasteners, ballast, or other attachment systems should match the permitted design and manufacturer instructions.
Structural path
The array loads must transfer into rafters, framing, ballast, ground-mount posts, or another approved support system.
Waterproofing
Roof penetrations, flashing, sealant, and roof-protection details should be completed and verified before concealment.
Electrical pathway
Wire routing, conduit, junction boxes, inverter location, disconnects, and labeling must match code and the approved plan.
Plan set discipline
The permit set should not leave the mounting method to guesswork.
Good field work begins with clear documents.
The permit set should identify the system layout, mounting method, roof type, attachment pattern, structural notes where required, equipment placement, electrical path, setbacks, access requirements, and inspection expectations. The clearer the plan set, the less improvisation is needed on the roof.
Practical rule: the installer should not discover the mounting strategy while standing on the roof with a drill.
Before concealment
Some details should be checked before panels cover them.
Once the array is complete, the most important roof-protection details may be difficult to see.
Details worth verifying early
- Mounting-foot placement and attachment points.
- Rafter or structural target alignment where applicable.
- Flashing and sealant around roof penetrations.
- Rail attachment and hardware installation.
- Conduit penetrations and junction-box locations.
- Wire management before modules make access difficult.
Documentation that helps
- Overall roof and array-layout photos.
- Close-up photos of mounting feet before concealment.
- Photos of flashing and sealant details.
- Photos of rafter or attic verification where safe and useful.
- Plan-set notes and any approved field changes.
- Inspection record and final approval documentation.
Plain-language summary: inspection works best when the work is visible, documented, and consistent with the plan set.
Roof protection
Waterproofing should be inspection-ready.
A city inspection may focus on code compliance, but the homeowner also cares about the roof staying dry.
Roof penetrations, flashing, sealant, mounting feet, and rail placement should be installed in a way that can be explained and verified. A good permit path supports a good waterproofing path.
The roof penetration should correspond to the approved mounting and structural plan.
The flashing and sealant detail should protect the roof assembly.
The detail should be inspected or documented before panels hide the work.

Structural review
Inspectors need to see a credible load path.
Solar mounting must resist weight, wind, and long-term forces through an approved support path.

Roof Integrity & Rafters
Review rafters, spacing, framing condition, and attachment logic before installation.
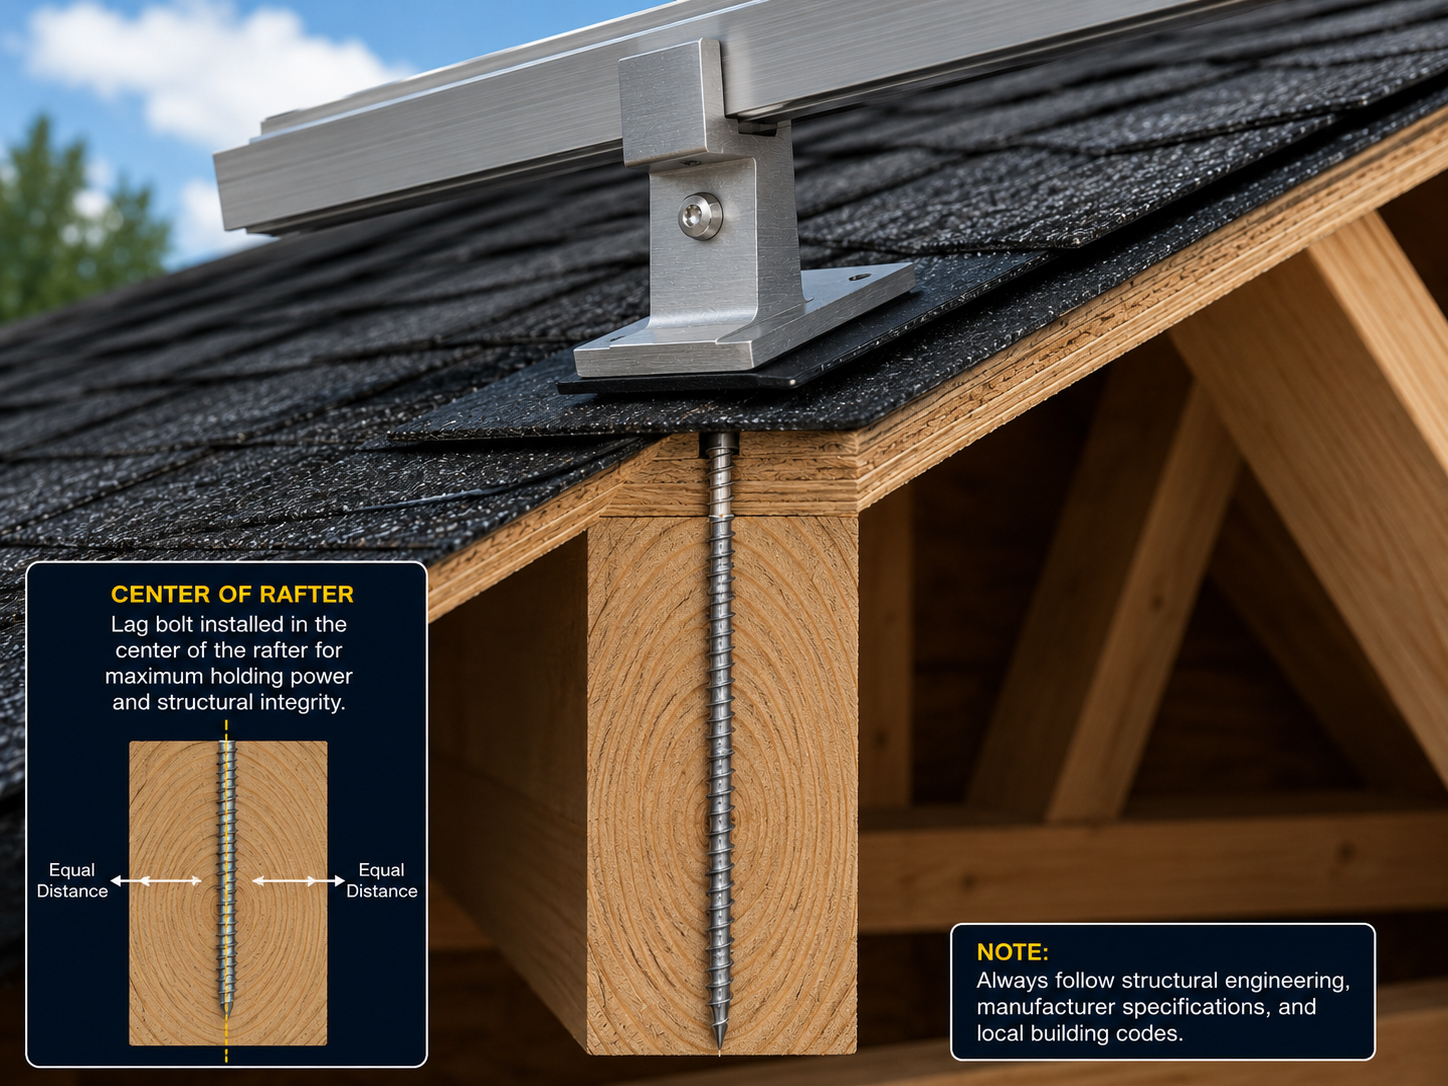
Lag Bolts Into Rafters
Fasteners must land in real structure according to the approved detail.
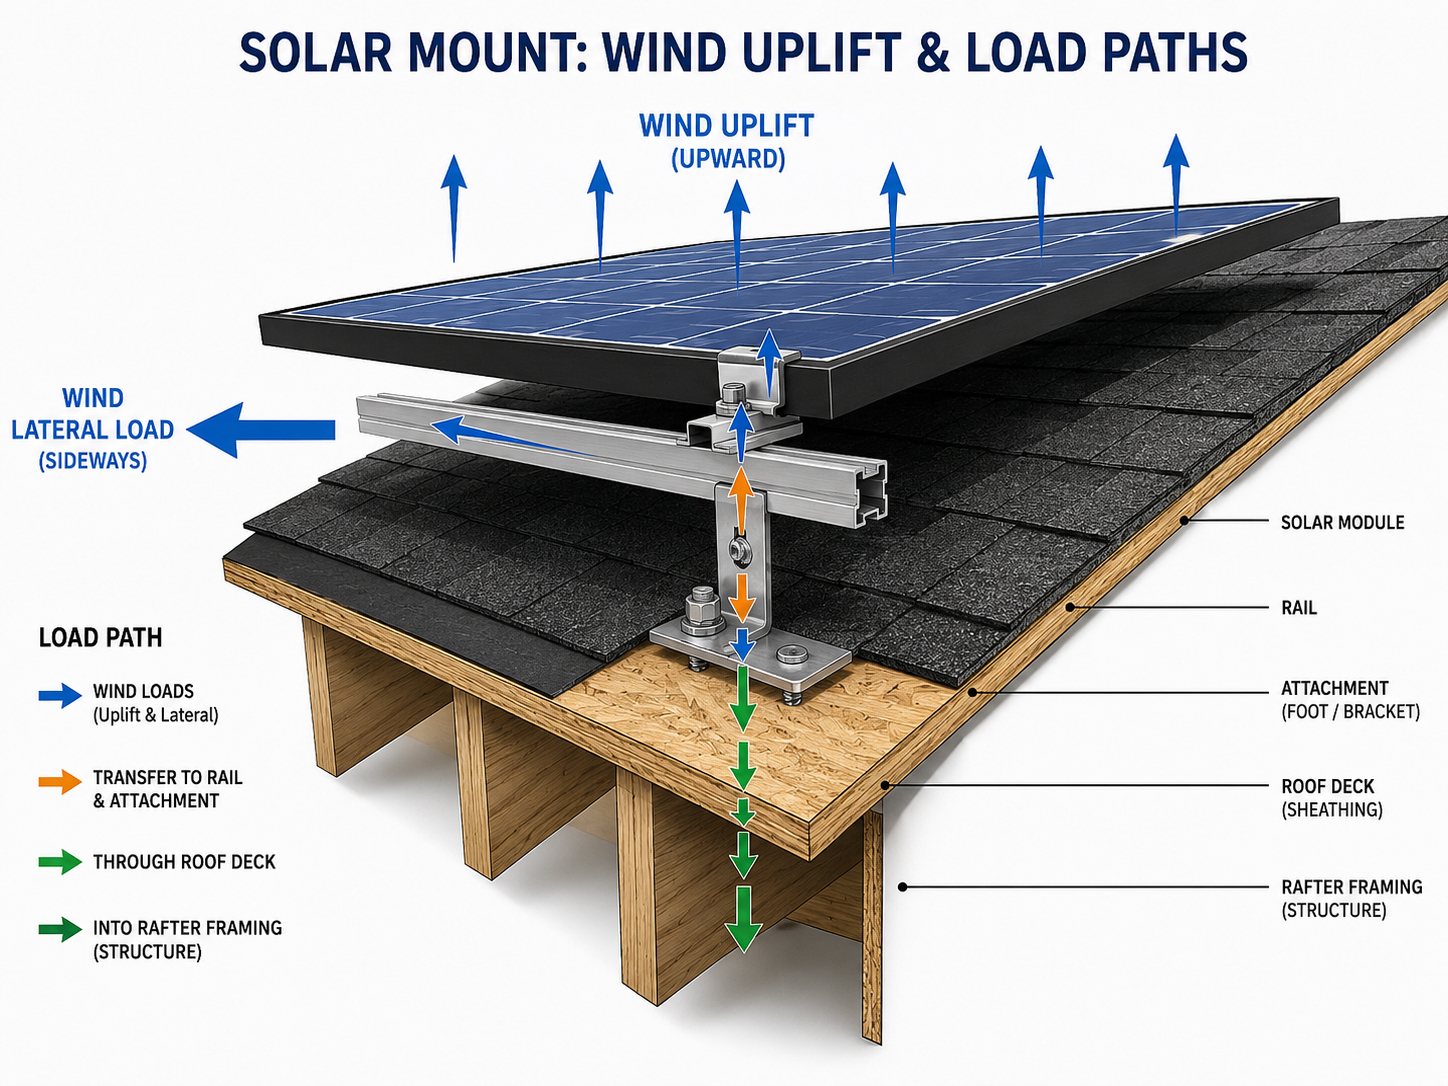
Wind Uplift & Load Paths
The array must transfer wind and weight into approved structure.
Important: SolarMount.com is educational. Actual permit approval, structural review, mounting details, inspection requirements, electrical code compliance, and final sign-off must follow the authority having jurisdiction, approved plans, manufacturer instructions, engineering requirements, and local code.
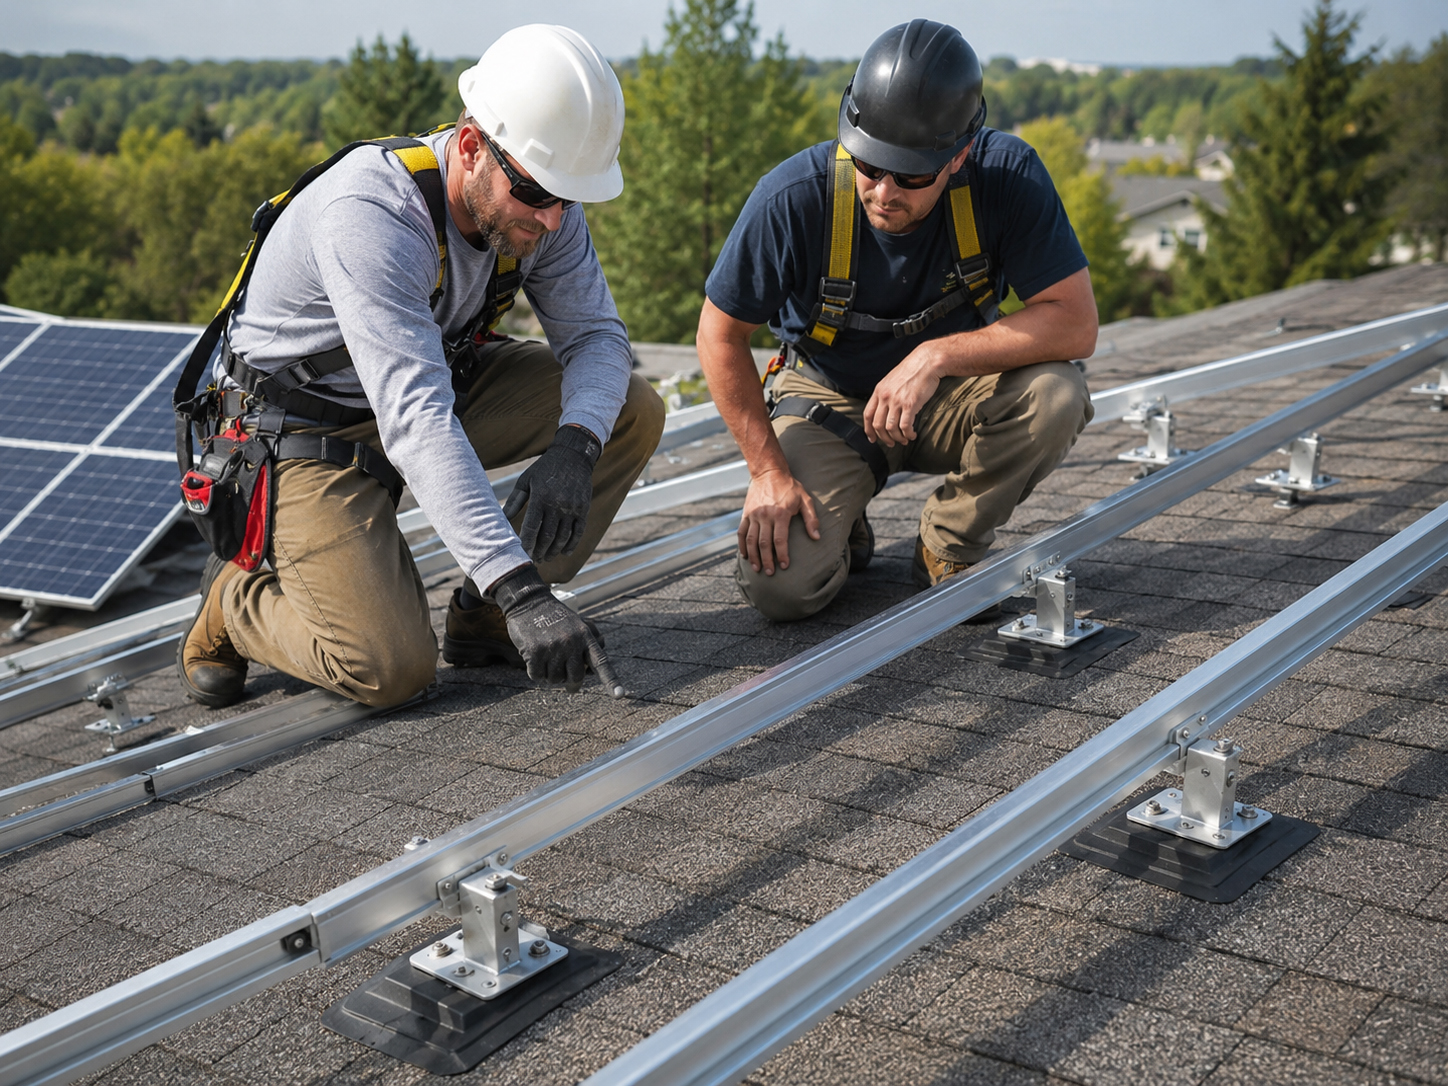
Trade coordination
Inspection is easier when the roofer and solar contractor are aligned.
The roofer sees the water path. The solar contractor sees the array. The inspector needs the final work to make sense.
Roof condition, flashing, penetrations, attachment details, and service access should be discussed before installation. Coordinated work reduces confusion during inspection and reduces finger-pointing later.
Plain-language summary: a good solar project should pass inspection without sacrificing the roof.
Homeowner clarity
The homeowner should know what gets inspected.
Inspection should not feel like a secret ritual.
A homeowner can ask what the city inspection covers, whether roof attachments will be visible, how waterproofing is documented, what the approved plan set says, and what final sign-off means. Clear communication helps the homeowner understand the value of doing the work correctly.
Good homeowner question: “Before the panels cover the mounting work, what will be photographed, documented, or left visible for inspection?”

Different project types
Permit review changes by mounting method.
Sloped roofs, flat roofs, ground mounts, carports, and building-integrated solar all raise different inspection questions.
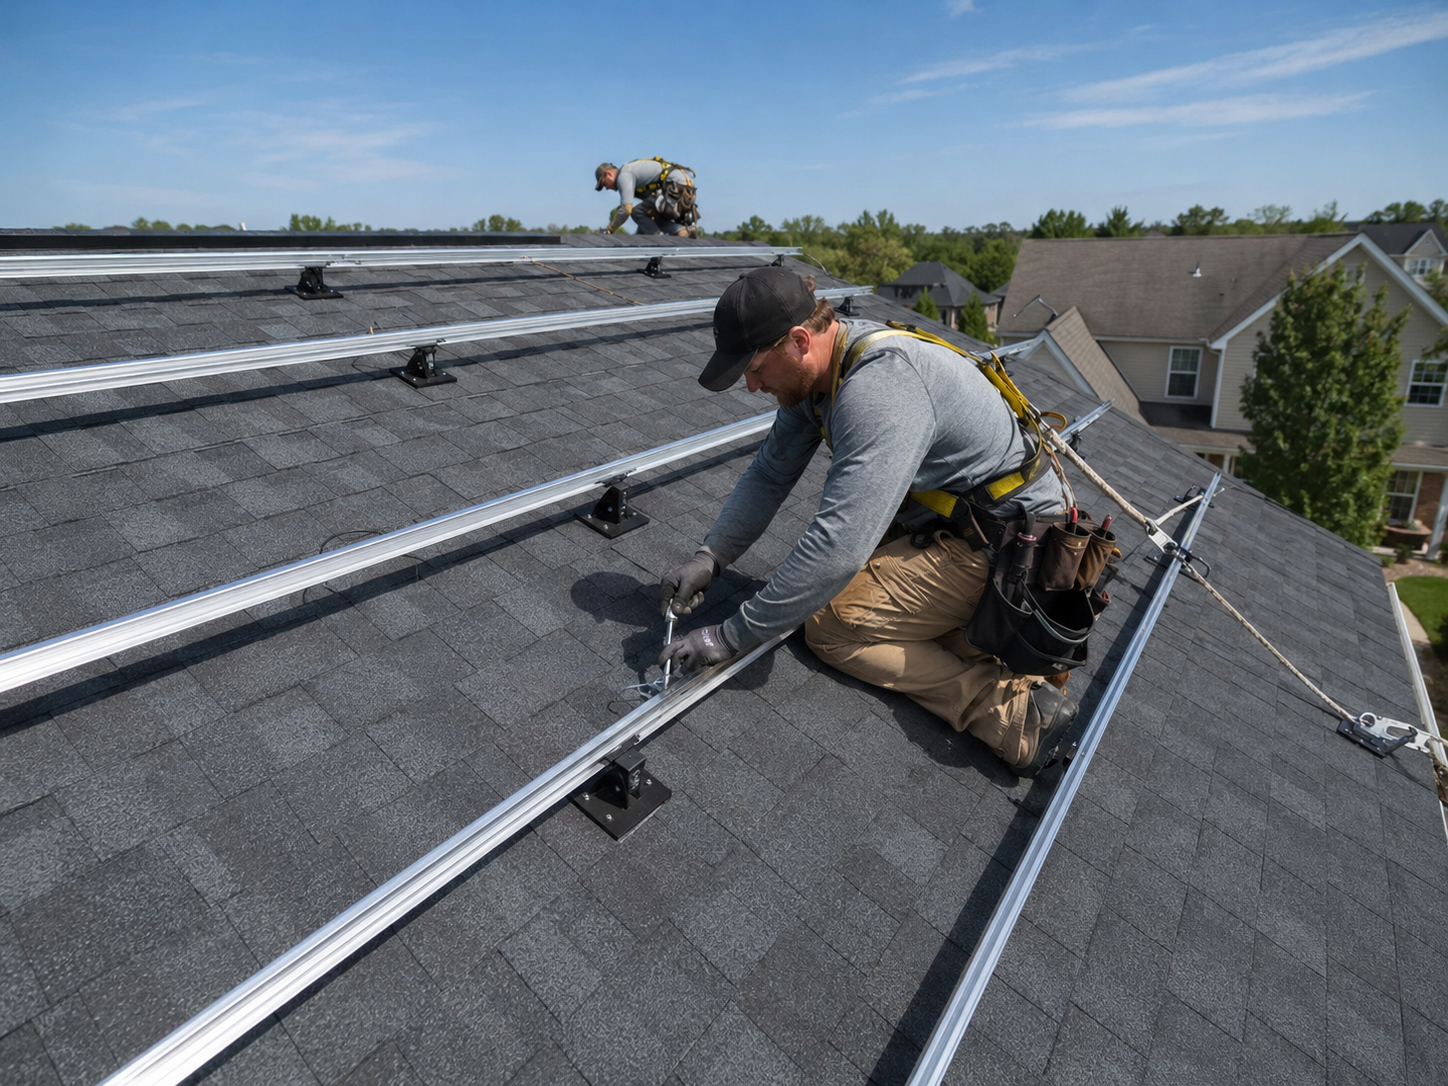
Composition Shingle
Inspection should understand flashed attachments, rafter connection, and rail layout.
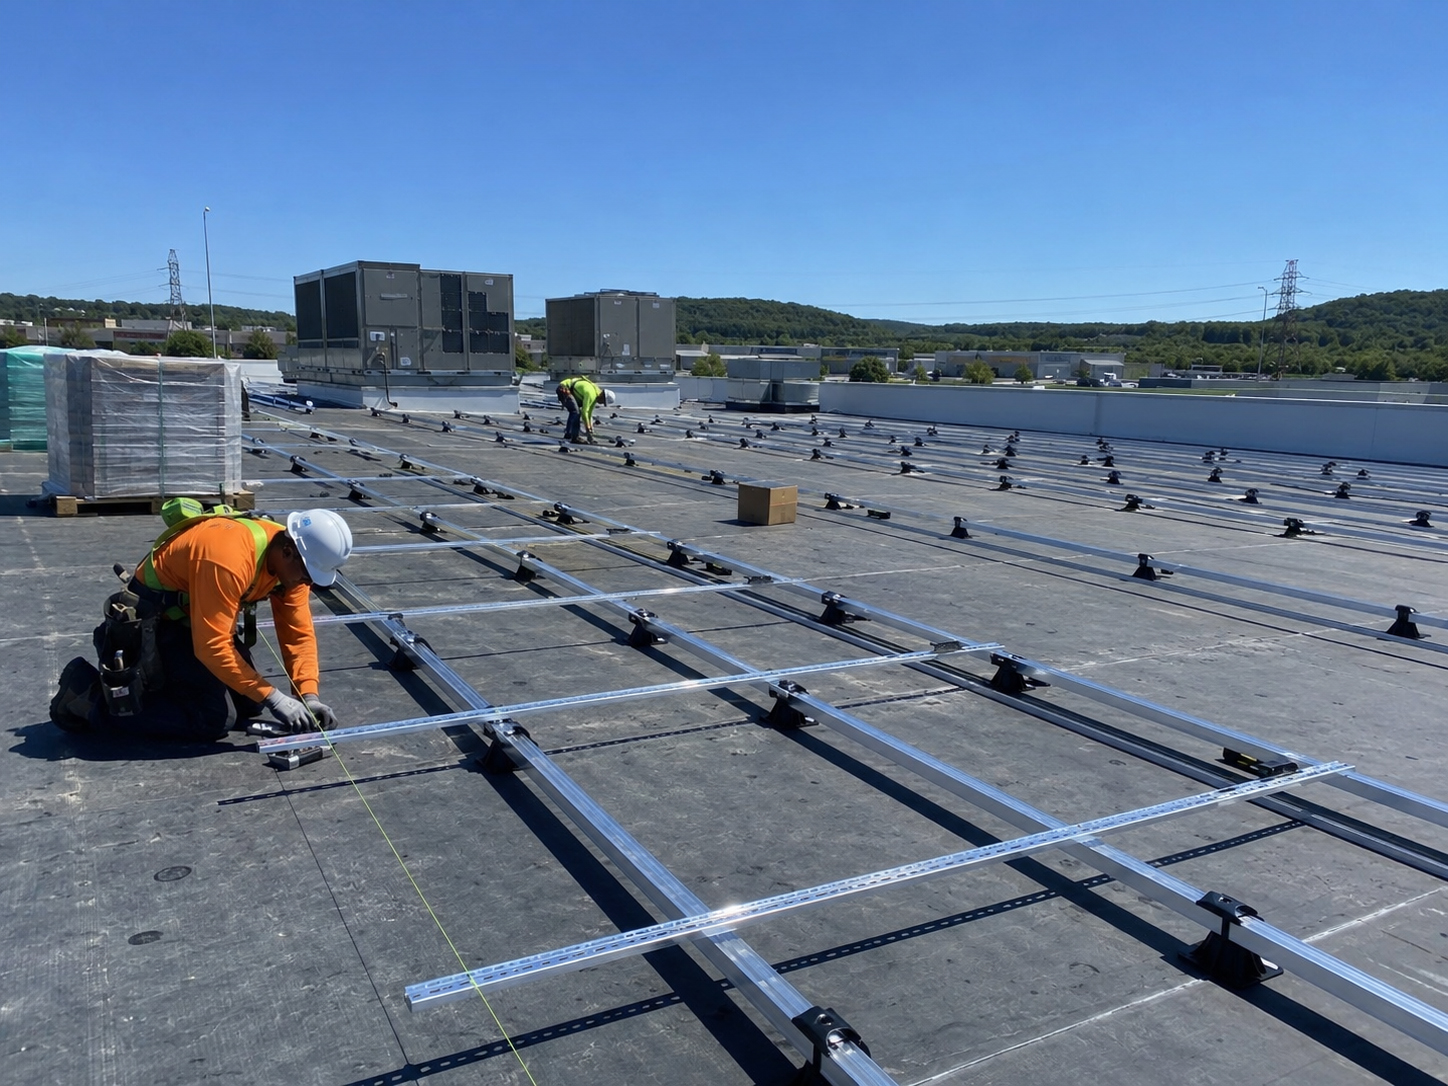
Flat Roof Solar
Review ballast, membrane protection, drainage, roof loading, and access paths.

Ground Mounts
Review posts, pipe, foundations, trenching, inverters, wiring, and site layout.
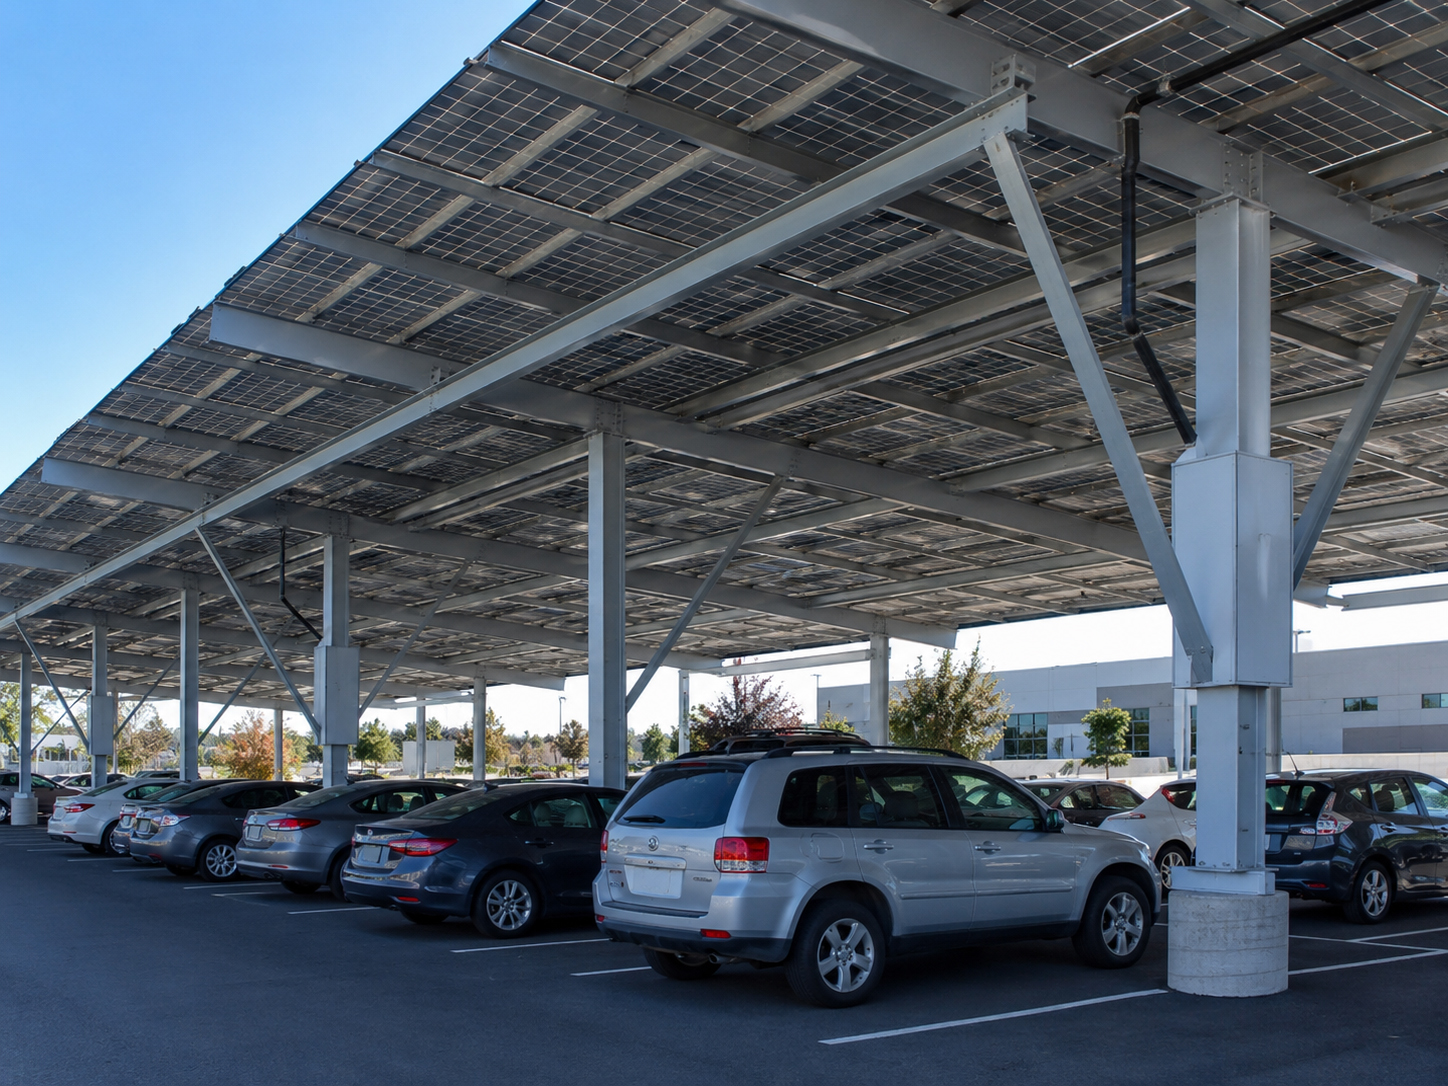
Solar Carports
Carports require structural, foundation, electrical, drainage, and access review.

Building-Integrated Solar
Facade and envelope-integrated systems require building-system review.

Structural Review
When the mounting plan needs deeper framing or load-path review.
Inspection conclusion
The best inspection is prepared before the inspector arrives.
Clear plan set. Clean mounting. Verified roof attachments. Waterproofing before concealment. Field work that matches the approved design.